REVIEW · KUALA LUMPUR
Private Kuala Lumpur Photographic Tour With Petronas Towers & Sky Box K.L Tower
Book on Viator →Operated by Travelvago · Bookable on Viator
Petronas views are the main reason to book. This private photo-focused tour helps you plan your shots across Kuala Lumpur, from the Petronas Twin Towers to KL Tower, with built-in stops for architecture and detail photos. I like that you get admission to the key viewpoints instead of just staring from the curb, and I like the photo-friendly pacing that keeps the day moving without turning it into a frantic sprint.
The only real drawback to think about is timing. You’re packing a lot into about 6 hours, so if you want long sits, shopping stops, or slow wandering, you may feel slightly rushed.
In This Review
- Key takeaways before you go
- Why this 6-hour private photo tour is a smart Kuala Lumpur plan
- Petronas Twin Towers: Skybridge + the 86th-floor Observation Deck
- Merdeka Square (Dataran Merdeka): where modern lines meet colonial style
- Taman Botani Perdana and the Orchid Gardens: a calm reset for your camera
- National Mosque (Masjid Negara): blue-and-green tile details
- KL Tower (Menara Kuala Lumpur): second skyline viewpoint, different vibe
- National Monument: bronze WWII memorial and local storytelling
- Istana Negara (King’s Palace): 22 domes and strong symmetry
- Thean Hou Temple: a photo stop with character and spiritual symbolism
- What “private photographic chauffeured” really means for your day
- Price and value: is $117 per person worth it?
- Who should book this tour, and who might skip it
- Should you book this private Kuala Lumpur photo tour?
- FAQ
- How long is the private Kuala Lumpur photographic tour?
- Is hotel pickup and drop-off included?
- What’s included in the Petronas Twin Towers admission?
- Is the KL Tower admission included?
- Do I need to pay for the other attractions?
- Are meals included?
- Is the guide English-speaking?
- Can I cancel for a full refund?
Key takeaways before you go
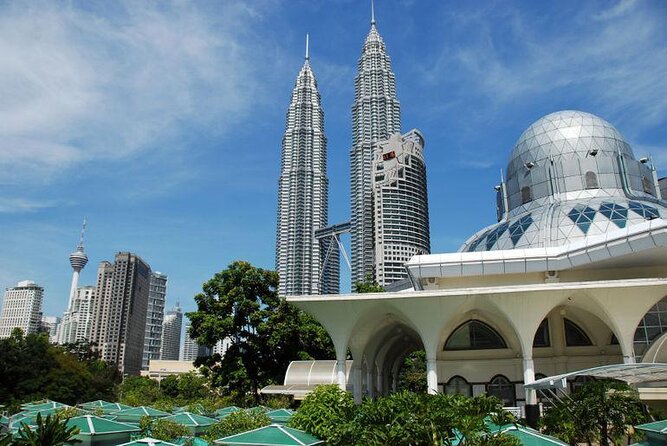
- Petronas Twin Towers access included with the Observation Deck and Skybridge so you can frame skyline shots from the inside
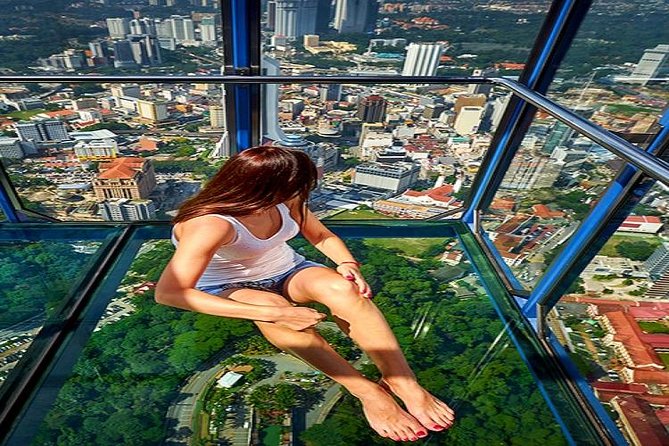
- KL Tower Observation Deck included, giving you a second, very different angle on the city
- A strong mix of stops: Merdeka Square, Lake Gardens/Orchid Gardens, National Mosque, National Monument, Istana Negara, and Thean Hou Temple
- Private, English-speaking driver/guide focused on helping both amateur and professional photographers
- Hotel pickup and drop-off by private vehicle, so you spend less time figuring out transport and more time shooting
- Free-entry photo stops sprinkled throughout, so you control your budget while still covering big sights
Why this 6-hour private photo tour is a smart Kuala Lumpur plan
Kuala Lumpur can feel like two cities at once. You’ve got polished modern towers and sky-feel viewpoints, but also colonial-era angles, royal architecture, and temples with strong visual character. This tour is built to help you capture that mix without wasting time.
What makes it work is the pairing of viewpoints with street-level subjects. You don’t just go up; you also get ground scenes where you can practice composition—lines, domes, tiled surfaces, and the kind of symmetry you usually only get when you’re willing to stop and look. The private format matters too. You’re not stuck waiting for a group, and the driver/guide can nudge the route and photo timing around what you’re trying to photograph.
One more practical plus: you get admission tickets included for the two biggest “pay-to-see” photography moments (Petronas and the KL Tower observation deck). That saves you the hassle of figuring out ticket timing on your own.
You can also read our reviews of more private tours in Kuala Lumpur
- Private Tour Kuala Lumpur with Petronas Twin Towers Observation Deck & Batu Cave
★ 5.0 · 1,029 reviews
Petronas Twin Towers: Skybridge + the 86th-floor Observation Deck
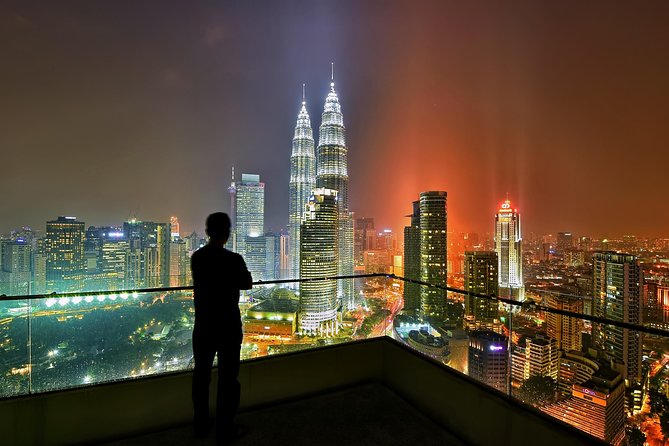
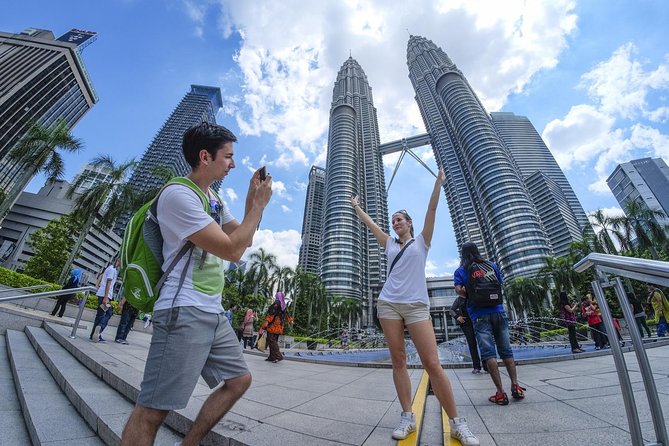
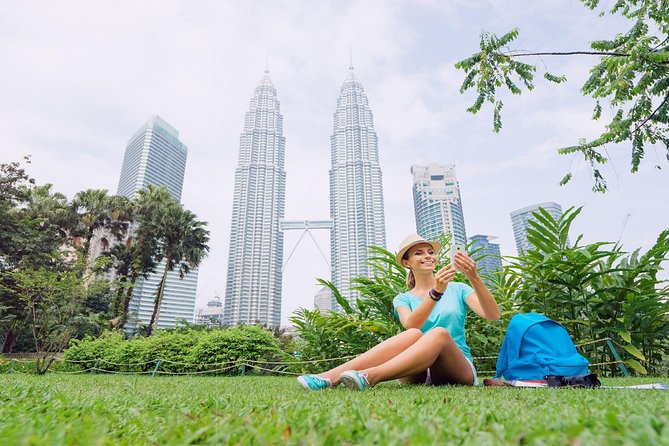
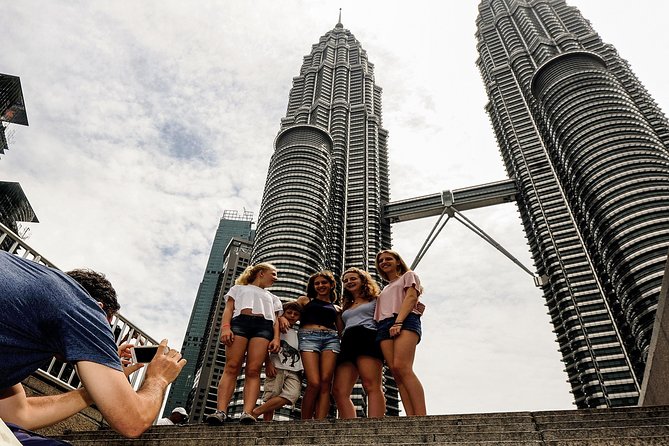
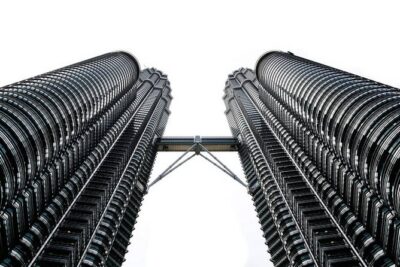
This is the star stop, and for good reason. Your tickets cover access to both the Observation Deck and the Skybridge, which means you can shoot wide skyline views and also the narrow, dramatic perspective that the skybridge creates between the towers.
Here’s what I’d plan for as you arrive: Petronas is famous, so expectation management helps. Give yourself time to settle your camera settings before you step into the viewpoint areas. Light can shift fast—especially if weather changes—so a quick test shot early can prevent frustration later.
Also, if you worry about heights, you’ll probably feel better knowing the sensation people describe is more about the building’s slight motion than anything truly frightening. One key thing to remember: at this elevation, even small movement can feel noticeable when you’re standing still while shooting. Keep a light grip, take short bursts of photos, and don’t try to rush your framing. You’ll still get clean shots—just plan your body rhythm.
Photo ideas that fit this stop
- Shoot the towers’ edges straight-on to emphasize vertical lines.
- On the observation deck, capture a few images with the skyline centered, then a few with the towers off to the side for depth.
- If you’re using a phone, use the grid/level tools if your camera has them. Straight lines matter here.
Merdeka Square (Dataran Merdeka): where modern lines meet colonial style
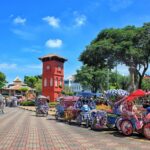
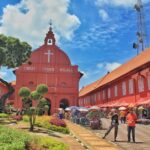
After the towers, you get a change of mood at Merdeka Square. This is where Kuala Lumpur plays architecturally: you see modern buildings mixed in with colonial masterpieces in the center of Independence Square. It’s a great place for practicing “contrast photography,” meaning you intentionally frame newer angles beside older façades.
This stop is quick—around 20 minutes—but that’s not a problem if you use it well. Arrive ready with a short shot list: one wide frame that shows the square’s geometry, one tighter frame that highlights details (cornices, windows, and building edges), and one photo that includes people only if you can keep them from overpowering the architecture.
Because it’s a free-entry photography stop, you can also take extra time without worrying about ticket time limits.
Taman Botani Perdana and the Orchid Gardens: a calm reset for your camera
Then comes the break from city edges. Lake Gardens (Taman Botani Perdana) gives you a green pause where you can slow down, breathe, and reset your photography brain. The tour specifically points you toward the Orchid Gardens, which is useful because orchids are all about pattern and color—great for close framing.
Even if you’re not a macro photographer, this part helps your overall photo set. Your day gets too “tower-heavy” if every image looks like the skyline. Flowers and garden paths add texture and pacing. Also, with plants, you can work on depth: foreground leaves, midground stems, and a softly blurred background that still shows the setting.
Practical tip: move with intent here. Take a few steady shots from the same spot, then walk 10 to 20 steps and repeat. That gives you variety without turning the garden into a scavenger hunt.
National Mosque (Masjid Negara): blue-and-green tile details
Next is Masjid Negara, and it’s all about surfaces and shape. The tour description highlights the blue-and-green tiled main dome, which means you don’t need to hunt for good visuals—you just point your lens.
This is a free-entry stop of about 20 minutes, so you’ll want to be ready to shoot quickly. Aim for both:
- A wide shot that captures the dome and its overall presence
- A detail shot that shows tile color and pattern
If you’re photographing with a camera, consider bracketing exposure slightly. Dome surfaces can reflect light, and you want to avoid blowing out the bright areas while keeping the color.
- Private Tour Kuala Lumpur with Petronas Twin Towers Observation Deck & Batu Cave
★ 5.0 · 1,029 reviews

KL Tower (Menara Kuala Lumpur): second skyline viewpoint, different vibe
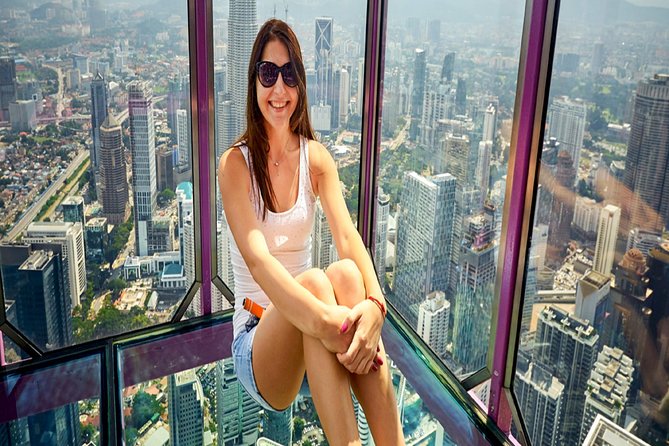
After the mosque, you rise again—this time at KL Tower, also called Menara Kuala Lumpur. Your ticket includes the Observation Deck only, so think of this stop as your “skyline second take.”
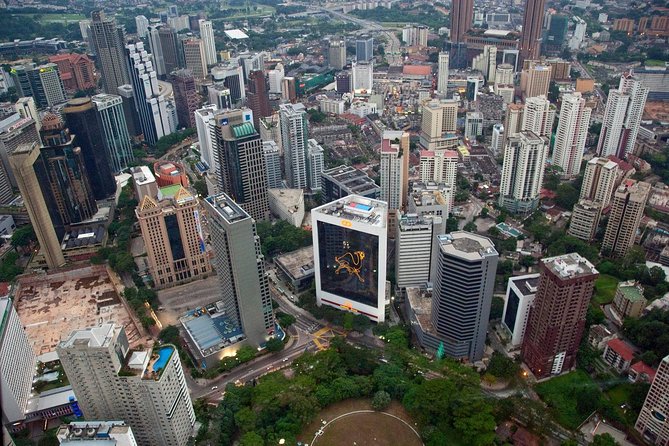
The best part about this viewpoint compared to Petronas is the angle shift. Petronas gives you a skyline built around the towers themselves. KL Tower lets you photograph a broader city layout and skyline spread, which helps your photo story feel complete.
One thing I’d plan for: the air around observation decks can be cooler and breezy. That’s not a problem, but it can mess with stabilization if you’re trying to do long-exposure shots with wind. If it’s gusty, keep shutter speeds reasonable and focus on sharpness.
What to shoot here
- A wide skyline with the city’s layers (foreground, mid, and far)
- One “tower-to-city” framing where KL Tower sits in the image along with distant buildings
- A nighttime plan if you’re going later in the day, since city lights can add drama
National Monument: bronze WWII memorial and local storytelling
Now you get something different from towers and temples: National Monument. This stop is around 15 minutes and includes a history-and-art focus. The big standout described is the bronze sculpture created to commemorate soldiers who lost their lives during World War II.
For photography, monuments reward patience more than speed. Instead of trying to cram in ten shots, do three solid ones:
- A front-facing view
- A shot that uses surrounding angles to frame the sculpture
- A detail photo that highlights the bronze texture
Even if you’re not studying the historical displays, the visuals help you understand the city beyond its skyline. It’s a moment where Kuala Lumpur looks outward at identity and remembrance.
Istana Negara (King’s Palace): 22 domes and strong symmetry
Next up is Istana Negara, the King’s Palace, and it’s built for cameras. The tour description calls out an architecture style with 22 domes, which is a gift for anyone who likes repeating shapes and symmetry.
This stop is about 20 minutes, which is enough for the basics. I’d focus on:
- A wide frame that captures the dome count and roofline rhythm
- A tighter crop that emphasizes one or two domes with surrounding detail
Because it’s an official royal complex, don’t assume you can wander everywhere for photo angles. Use the time you’re given to get your best perspectives from the accessible areas.
If you’re trying to make your portfolio feel cohesive, this stop pairs nicely with Merdeka Square: both are architectural, but one mixes eras and one highlights royal grandeur.
Thean Hou Temple: a photo stop with character and spiritual symbolism
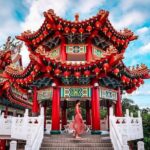
The day finishes with Thean Hou Temple, a Chinese temple noted for a mix of Buddhism, Taoism, and Confucianism. The tour also points out animals from astrology, which means the temple isn’t just “pretty”—it’s visually storytelling. That gives you plenty to photograph beyond the main structures.
This stop is about 30 minutes, and it’s often the kind of location where it’s easy to keep shooting because there are so many surfaces and carvings. Temples are also where light often becomes softer and more forgiving, especially under overhangs and shaded areas.
Photo ideas that fit Thean Hou
- Shoot an overall shot first, so you anchor your image set
- Then shift to detail photos: carvings, animal motifs, patterned surfaces
- Look for signs of layering—foreground ornament plus temple structure in the back
If you’re working on composition, try one image with a lot of structure lines and another with lots of texture detail. You’ll end up with a balanced set rather than ten nearly identical shots.
What “private photographic chauffeured” really means for your day
“Private” is more than a marketing word here. It changes how the day feels. You’re not racing between stops or waiting while others debate whether to go in. You can shape the pace around your needs—especially helpful if you’re shooting with a phone, a DSLR, or something in-between.
The tour is also designed for both amateur and professional photographers, and that shows up in the structure: big “must-get” viewpoints plus smaller architectural stops for detail practice. Your guide is English-speaking, which matters if you want practical help like where to stand for better angles or how to time a shot as lighting shifts.
I also like that the tour includes hotel pickup and drop-off by private vehicle. In Kuala Lumpur, traffic and distance can eat time fast. If you’re trying to make a half-day work, reducing transit friction is a real quality-of-life win.
Price and value: is $117 per person worth it?
At $117 per person, you’re paying for four things at once:
- Private transport with pickup and drop-off
- An English-speaking driver/guide for about 6 hours
- Access and admission included at the two major skyline photo venues
- Time efficiency across multiple high-value sights
If you were to DIY, you’d still likely spend money on admission tickets for Petronas and KL Tower observation access, plus you’d pay for transport and deal with ticket timing on your own. The tour’s value shows up most when you want multiple iconic stops without the stress of planning them tightly.
Where it may not be perfect is if you’re the type who only cares about one or two attractions. In that case, a smaller itinerary could fit better. But if your goal is to leave Kuala Lumpur with a photo set that covers skyline, architecture, and cultural landmarks, this format is priced like a practical bundle.
Food isn’t included, so budget for snacks or a meal on your own. Gratuities are also optional.
Who should book this tour, and who might skip it
This tour fits you best if:
- You want iconic Kuala Lumpur viewpoints in one half-day
- You care about architecture photos—domes, tiles, symmetry, and skyline lines
- You prefer a private setup where you can control your pacing
- You’re traveling with a camera and want help making the day “shootable”
You might skip it if:
- You want lots of free time to wander slowly without structure
- You’d rather focus on markets, shopping, or food culture as the main theme
- You only care about one viewpoint and nothing else
Should you book this private Kuala Lumpur photo tour?
If you want a fast, photo-focused tour that stacks the biggest photographic wins—Petronas Skybridge and Observation Deck, KL Tower Observation Deck, plus major architectural and temple stops—then yes, this is a strong choice. The included admission tickets and hotel pickup make it feel efficient, and the private format keeps you from wasting time.
If you’re nervous about heights, don’t cancel for that reason. Plan for slight motion at high elevations, move slowly while you frame shots, and you’ll likely find the experience more manageable than you expect.
FAQ
How long is the private Kuala Lumpur photographic tour?
It runs for about 6 hours.
Is hotel pickup and drop-off included?
Yes. The tour includes hotel pickup and drop-off by private vehicle.
What’s included in the Petronas Twin Towers admission?
Your tickets include access to the Observation Deck and the Skybridge at the Petronas Twin Towers.
Is the KL Tower admission included?
Yes. Entry to the KL Tower Observation Deck is included.
Do I need to pay for the other attractions?
Some stops include free entry (like Dataran Merdeka, Lake Gardens, National Mosque, National Monument, Istana Negara, and Thean Hou Temple). Admission inclusion is specifically called out for Petronas and KL Tower.
Are meals included?
No. Food and beverages are not included.
Is the guide English-speaking?
Yes, the tour includes an English-speaking driver/guide.
Can I cancel for a full refund?
Yes, you can cancel up to 24 hours in advance for a full refund.
You Might Also Enjoy
More Private Tours in Kuala Lumpur
- Private Tour Kuala Lumpur with Petronas Twin Towers Observation Deck & Batu Cave
★ 5.0 · 1,029 reviews