REVIEW · KUALA LUMPUR
Malaysian Batik Experience-Handkerchief
Book on Viator →Operated by JADI BATEK · Bookable on Viator
A studio class beats the usual KL rush. In about two hours, you’ll learn how Malaysian batik is made, then create a scarf or handkerchief-style piece you’ll actually want to keep. The best part is you’re not left on your own: the team guides you step by step, from sketch to hot wax to color.
I especially like that you get a quick history-and-process intro, then jump straight into hands-on work with canting and fabric dyes. You also get to pick your own design from ready templates and colors, which makes it easier than starting from a blank page.
One thing to consider: if you want a fully finished, properly dried piece (or you’re making a handkerchief), you may need to wait longer or pick up the next day.
In This Review
- Key things to know before you go
- Malaysian Batik in Kuala Lumpur: what this class really feels like
- Where the class starts: Jadi Batek in downtown KL
- Step-by-step batik process: your two hours on the wax-and-color trail
- 1) Intro to batik history and how the process works
- 2) Sketch your scarf design from templates
- 3) Apply hot wax with the traditional canting tool
- 4) Color with fabric dyes, including mixed colors
- 5) Drying and what you take home
- Scarf vs handkerchief: choosing your souvenir and timing
- If you make the scarf-style piece
- If you make it as a handkerchief
- The design choices that make this class feel personal
- Staff help: you’re not stuck guessing
- Price and value in downtown KL
- Practical tips so you get a better result
- Who should book this batik class
- A quick reality check: the main downside
- Should you book it?
- FAQ
- Do I need any prior art experience to do this batik class?
- How long does the Malaysian batik experience take?
- What do I get for the price?
- Can I choose my own design and colors?
- What is the difference between making a scarf and making a handkerchief?
- Are there optional add-ons if I want extra finishing?
- Is transportation included?
- Is the class private?
Key things to know before you go
- Beginner-friendly, guided from start to finish so you can focus on the fun parts instead of guessing techniques
- Canting + hot wax shows you the real batik method people use for decades and generations
- Design options are template-based with colors and motifs you can choose without being an artist
- You can customize colors, including mixing dyes for your own look
- Drying time affects pickup if you choose handkerchief style or want a fully finished result
- Downtown studio setup makes it a simple add-on to a Kuala Lumpur day
Malaysian Batik in Kuala Lumpur: what this class really feels like
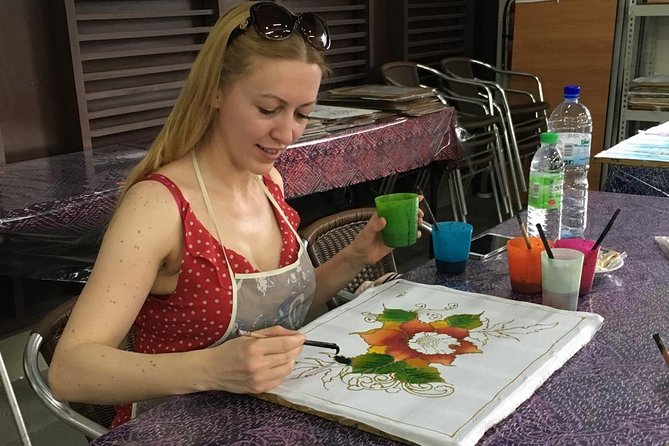
This is one of those KL activities that turns “cultural experience” into something you can hold in your hands. You’re in a studio setting, not wandering a market looking for the right stall. And you’re not just watching someone else work either. The structure is clear: learn the basics, sketch your plan, apply wax using a traditional tool, then paint with fabric dyes until your batik pattern shows up.
What makes it work for most people is that you don’t need prior art skill. The process is very hands-on, but the staff keeps you moving. You’ll still need patience and a steady hand for the wax and dye steps, yet you’re guided enough that your finished piece doesn’t feel like a guessing game.
Also, the surroundings tend to feel comfortable and practical for a craft session. One of the best practical notes here is simple: it’s a good hot-day option, because you’re indoors, working at a table, not stuck in Kuala Lumpur humidity while trying to get photos.
You can also read our reviews of more tours and experiences in Kuala Lumpur.

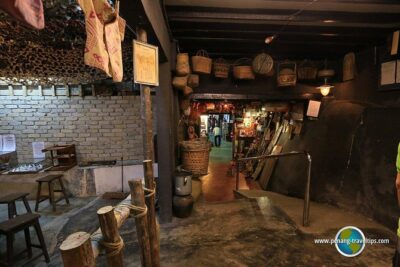
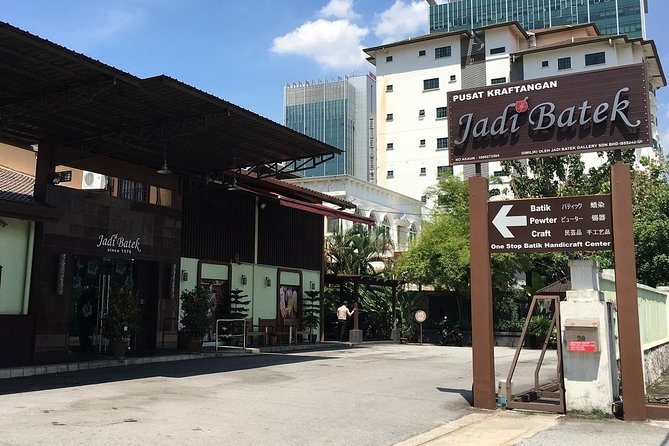
Where the class starts: Jadi Batek in downtown KL
Your meeting point is at Jadi Batek – Batik fashion gifts wholesaler retailer, 30, Jalan Inai, Imbi, 55100 Kuala Lumpur, Wilayah Persekutuan Kuala Lumpur, Malaysia. The exact plan is straightforward: you go to the studio, you finish your batik work there, and the activity ends back at the meeting point.
Two practical perks matter here. First, it’s listed as near public transportation, so you won’t need to plan an elaborate ride just for this. Second, the class is private for your group, which can make it easier to get help when you’re working with wax and dye.
If you’re pairing this with other KL stops, think of it like a “reset” activity. Instead of running from viewpoint to viewpoint, you get a controlled environment and a clear timeline.
Step-by-step batik process: your two hours on the wax-and-color trail
The experience is built around the real batik workflow: sketch, wax, color, dry, and finish. Here’s what that means in plain terms.
1) Intro to batik history and how the process works
When you arrive, the team introduces you to batik—its history and the traditional steps used to decorate fabric. This isn’t a long lecture. You get just enough context to understand why the wax matters and why the coloring step behaves the way it does.
If you’re worried you’ll be thrown into tools right away, this part helps. You see the logic before you start making decisions.
2) Sketch your scarf design from templates
Next comes the planning stage: you sketch your design for a batik scarf. The studio provides inspiration and templates, so you can choose a motif and shape it into your own composition.
This is a big value point for beginners. When you’re selecting from templates, you still get creative input, but you avoid the most stressful part of art classes: inventing everything from scratch.
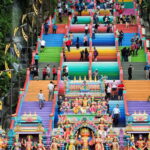
- Private Tour Kuala Lumpur with Petronas Twin Towers Observation Deck & Batu Cave
★ 5.0 · 1,029 reviews


3) Apply hot wax with the traditional canting tool
After your sketch is ready, you use canting, a traditional tool used to apply hot wax. The wax is what creates the batik pattern barriers. It’s the key technique that separates batik from normal painting.
This is also the point where you slow down. Wax work requires steadiness. You don’t have to be perfect, but you do need to take your time during lines and filled areas, because sloppy wax edges can affect how colors land later.
4) Color with fabric dyes, including mixed colors
Then you move to coloring. You paint the fabric using dyes provided by the workshop, and you can even mix custom colors. This is where your design starts looking like your design.
You can be bold with color choices here. You’ll see how the wax resist changes the outcome, so what you paint becomes a real batik pattern rather than just pigment on cloth.
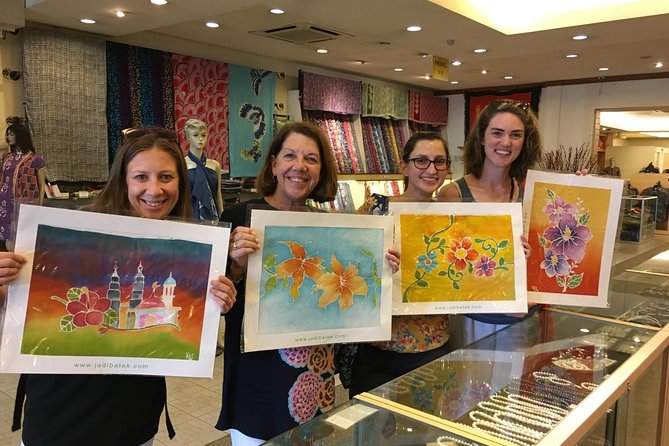
5) Drying and what you take home
Once you finish the drawing and painting part, the activity ends and the team dries your fabric quickly so you can take it home.
That’s the base plan. But here’s the important twist: your final pickup timing changes if you choose a handkerchief option or if you want extra finishing steps.
Scarf vs handkerchief: choosing your souvenir and timing
The class supports taking your work home, but the best choice depends on how patient you are with drying and finishing.
If you make the scarf-style piece
The workshop dries your batik after you complete the painting portion, and you can take it home at the end of your session.
If you make it as a handkerchief
You’ll need to wait 4 hours to collect it, or come back the next day. The longer wait is about getting the fabric ready to handle and wash.
One helpful note from the experience description: if you want your batik to be washable, drying and finishing matter. The class team can guide you on what kind of pickup timing matches your choice.
If you’re flying soon, this is where you’ll want to plan ahead so you’re not stuck with a half-finished cloth in your hotel bag.
The design choices that make this class feel personal
A lot of art classes say you’ll get creative, then hand you a template and call it a day. This one works better because you actively choose what you want.
You can:
- pick a design from many available templates
- choose your own color palette
- mix colors to create a more personalized look
Even better, the studio sets you up with inspiration and templates before wax begins. That means your creativity shows up in the final pattern, not just in choosing between pre-painted options.
Also, the class is described as suitable for families and groups with kids old enough to follow steps. You’ll still need careful hand control for the wax stage, but the pacing and guidance help.
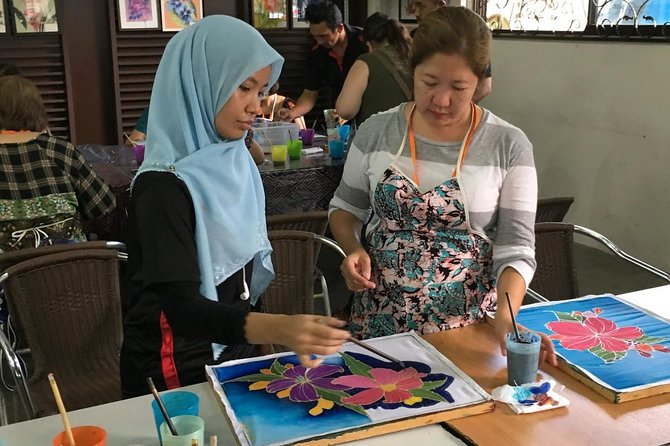
Staff help: you’re not stuck guessing
Guides are on hand from start to finish, which you’ll feel the moment you pick up the tools. The staff explains what to do, demonstrates the technique, and gives support as you work.
A name that comes up in feedback is Ms. Carol. People specifically note how helpful she is when it comes to understanding the steps and getting a good result.
What I like about this setup is that it reduces the usual “craft class anxiety.” You don’t feel like you’re performing. You feel like you’re learning a skill that makes a souvenir with real technique behind it.
Price and value in downtown KL
At $17 per person, this is priced like a true activity, not just a shop stop. The value comes from three things that add up fast in other places:
- You get tools and materials included, so you’re not paying extra to get started
- You get GST included
- You get snacks and bottled water, which sounds small until you realize most “creative” classes forget the practical part
For budget planning, the two main cost “gotchas” aren’t hidden fees—they’re optional upgrades.
Optional add-ons include:
- sewing the edge of the batik for RM10
- courier service for batik to your home (fee depends on location)
If you want an easier souvenir to pack or a more finished look, the sewing add-on can be worth it. If you prefer not to carry fragile fabric, the courier option might save you stress.
Practical tips so you get a better result
This class is beginner-friendly, but a few smart choices help your final batik look crisp.
- Expect a steady-hand moment during the wax stage. Slow down. Clean lines matter more than speed.
- If you care about having your batik ready for handling and washing, pay attention to the drying and pickup timing.
- If you’re sensitive to timing, decide early whether you want scarf take-home now or a handkerchief with longer pickup time.
- If you’re chasing specific effects like lighter white lines after wax removal, plan on extra time. The workshop timing can extend when additional steps are needed.
Also, take your time choosing colors. Mixing dyes can be fun, but the best palettes tend to come from thinking about contrast—dark wax-resist areas paired with lighter dyed zones.
Who should book this batik class
This experience is a good match if you want a hands-on KL activity that still feels cultural and authentic. I think it suits:
- couples who want a meaningful souvenir that isn’t another magnet
- families with kids who can follow instructions and enjoy crafts
- travelers who like learning a process, not just taking photos
- anyone who wants an art project they don’t have to be “good at” beforehand
If you’re the type who gets bored in workshops where you sit for long explanations, you’ll likely prefer this one because the structure moves you from intro to doing, step by step.
A quick reality check: the main downside
The main consideration is timing. Even though the active class is around 2 hours, your finished item may require drying time beyond the session depending on whether you choose handkerchief style or want extra finishing.
So if your schedule is tight and you’ve only got one shot at that afternoon, confirm pickup expectations before you commit. Then build around it, not against it.
Should you book it?
Yes, if you want a calm, guided creative activity in Kuala Lumpur and you’d like a souvenir made with real technique. The combination of canting hot-wax instruction, design templates, and included materials makes it a strong value at $17.
Book it especially if you don’t want to gamble on finding a cultural craft experience that’s actually hands-on. This one gives you the process, the tools, and the support so your batik comes out looking like a real project, not a rushed craft.
If your itinerary is ultra-tight and you can’t handle waiting for drying or next-day pickup, you might want to choose the scarf-style take-home option—or pick a different day when you have more breathing room.
FAQ
Do I need any prior art experience to do this batik class?
No. The experience is designed for beginners, with a guide on hand from start to finish who helps you through sketching, waxing, coloring, and finishing.
How long does the Malaysian batik experience take?
The class lasts about 2 hours (approx.) for the main activity, with drying and pickup timing depending on whether you choose scarf-style take-home or a handkerchief.
What do I get for the price?
The price includes tools, materials, GST, bottled water, and snacks. It also includes guidance through the batik process.
Can I choose my own design and colors?
Yes. You can select a design from available templates and choose colors. You can also mix custom colors using the dyes provided.
What is the difference between making a scarf and making a handkerchief?
A scarf-style piece is dried so you can take it home after the class. If you choose the handkerchief option, you need to wait 4 hours or return the next day to collect it.
Are there optional add-ons if I want extra finishing?
Yes. Optional services include sewing the edge of the batik for RM10, and a courier service to your home with a fee based on location.
Is transportation included?
No. Transportation to and from attractions is not included.
Is the class private?
Yes. This is a private tour or activity, so only your group participates.