REVIEW · KUALA LUMPUR
Private Day Kuala Lumpur Photographic Tour With Petronas Twin Tower & Batu Caves
Book on Viator →Operated by Travelvago · Bookable on Viator
Petronas towers and temples, timed for photos. This private Kuala Lumpur day trip is built for photography-first sightseeing, with stops that mix big skyline icons and calmer corners you can actually frame well. You’re moving through the city on a planned route that keeps famous places close together, so your camera gets the attention.
I especially like two things: first, the included admission to the Petronas Twin Towers and KL Tower (plus a Sky Box backup if Petronas entry is tight). Second, the route jumps across styles—royal domes, colonial-meets-modern squares, Chinese temple color, and cave spirituality—so you’re not taking the same kind of photo all day.
One thing to consider: you’ll do real walking, and there’s a stair climb at Batu Caves as well as optional climbing at KL Tower. If you’re hoping for a totally low-impact day, plan for some stairs and bring comfortable shoes.
In This Review
- Key things I’d plan around
- How this private Kuala Lumpur photo tour actually helps you take better pictures
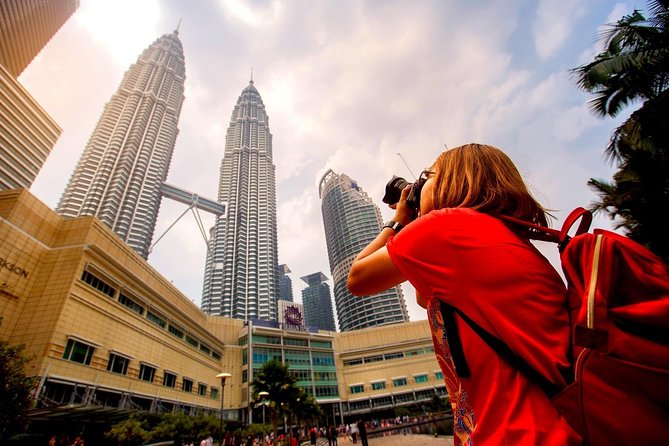
- Petronas Twin Towers: included entry plus a backup option for your best viewing
- Istana Negara and Dataran Merdeka: royal domes to colonial-meets-modern city geometry
- Lake Gardens (Taman Botani Perdana): orchid color and calmer pacing
- Thean Hou Temple: red pillars, dragon details, and a spiritual photo palette
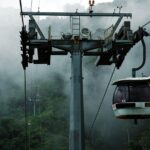
- KL Tower: 421 meters up, included observation access, and two ways to get there
- National Mosque (Masjid Negara): architecture learning with short, focused time
- Chinatown stop: street-photo energy, food smells, and souvenirs within reach
- National Monument area: a quick icon stop for grounding your Kuala Lumpur set
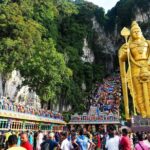
- Batu Caves: the stair climb you’ll want to plan for
- What’s included, what’s not, and why that matters for your budget
- Who this tour is best for (and who should look elsewhere)
- Should you book this Petronas-and-Batu-Route photo tour?
- FAQ
- FAQ
- How long is the Private Day Kuala Lumpur Photographic Tour?
- Is this tour private or shared with other groups?
- Is there an English-speaking guide or driver?
- What major attractions have admission included?
- What happens if Petronas Twin Tower tickets aren’t available last minute?
- Do I get hotel pickup and drop-off?
- Is KL Tower entry included?
- Are meals and drinks included?
- What is the cancellation policy?
Key things I’d plan around
- Petronas Twin Towers admission included, with a Sky Box ticket fallback if last-minute entry isn’t available
- KL Tower observation deck included (and you can choose stairs or elevator)
- A photo-focused route that blends iconic architecture with temple color and city-square geometry
- Hotel pickup and drop-off included, plus airport transfer if you need it
- Most major stops have free admission, so your budget mostly goes into the experience design and transport
- A private tour that keeps pacing calmer and easier for photography
How this private Kuala Lumpur photo tour actually helps you take better pictures
The difference with a photo-themed tour is not just where you go—it’s how the day is set up. In Kuala Lumpur, the “best shot” is often about timing, not talent. If you’re stuck trying to plan transit while also watching the light, you lose time and photos.
Here, your driver/guide handles the movement and logistics. That means you can focus on composition—getting a clean foreground, balancing vertical lines, and shooting details (domes, pillars, dragons, temple roofs) instead of only chasing wide skyline views. It also helps that most stops are short but intentional, so you’re not wandering without a plan.
The day is designed to be efficient in 6 hours. With pickup in the morning or afternoon (depending on your schedule), you’ll cover major landmarks without the dead time that can happen when you’re traveling solo or with a non-photo itinerary.
You can also read our reviews of more private tours in Kuala Lumpur
- Private Tour Kuala Lumpur with Petronas Twin Towers Observation Deck & Batu Cave
★ 5.0 · 1,029 reviews
Petronas Twin Towers: included entry plus a backup option for your best viewing
The Petronas Twin Towers stop is the headline. You get admission, and the tour includes your time there (about 1 hour). For photos, that’s exactly what you want: enough time to do at least two approaches—wide skyline framing and tighter detail shots—without feeling rushed.
A big practical win is the ticket safety net. If Petronas Twin Tower tickets aren’t available for last-minute booking, the tour includes Sky Box tickets. That matters because the towers can be the one thing that ruins your schedule if entry doesn’t work.
Tip for your camera: when you’re near tall glass-and-steel towers, reflections are part of the scene. Don’t fight them—use them. Also, pay attention to verticals. Kuala Lumpur has plenty of “straight lines,” so a little leveling and a slower shutter choice (if your camera allows) can make your photos look far more intentional.
Possible drawback: if you’re the type who wants an hour-long photo walk around the whole complex at a leisurely pace, the schedule is more structured. You’ll get time to shoot, but the day keeps moving.
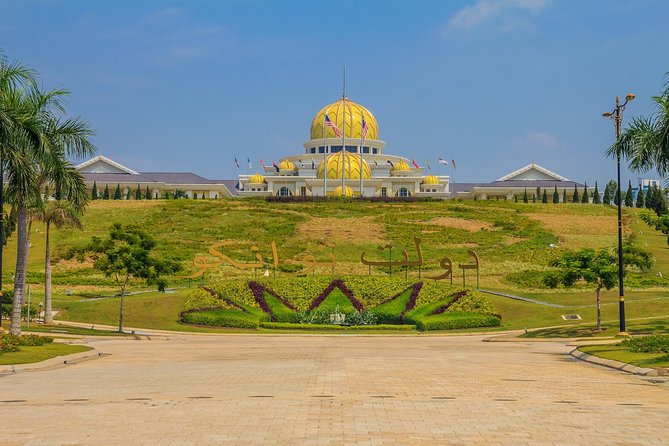
Istana Negara and Dataran Merdeka: royal domes to colonial-meets-modern city geometry

After the towers, the itinerary shifts to architecture that’s visually rich but still very workable for photography.
Istana Negara (King’s Palace) is about 20 minutes, and it’s ticket-free on this tour. The key photo hook here is the complex’s opulent look and the 22 domes mentioned in the tour info. Domes are great for photos because they give you natural curves to balance against straight walls—an easy way to make your images look “designed,” not accidental.
Then comes Dataran Merdeka (Independence Square) for around 15 minutes. This is where you can capture that Kuala Lumpur mix: modern buildings living alongside colonial-era landmarks. Even if you’re not photographing buildings for a living, the scene is perfect for practicing your “layering” shots—foreground monument, mid-ground street energy, background skyline.
Possible drawback: both stops are shorter. They work well if you like guided momentum, but if you want lots of wandering, treat these as “get the shot, move on” moments rather than long photo sessions.
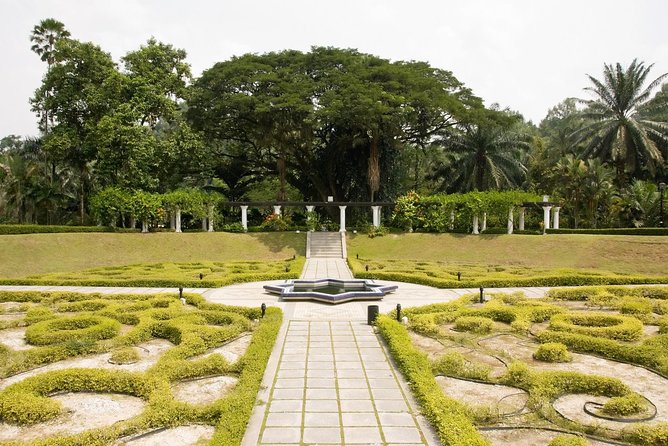
Lake Gardens (Taman Botani Perdana): orchid color and calmer pacing
Next you get a break from the city’s constant motion. Lake Gardens / Taman Botani Perdana is about 20 minutes and free. The tour description calls out orchid-focused opportunities, including the Orchid Gardens area for photos.
This is a smart addition to a photo day. When your earlier shots are mostly hard lines—towers, domes, squares—orchids and garden trails let you reset. You’ll have more chances for color, textures, and close-up framing that doesn’t require height or complicated angles.
Practical photo tip: in gardens, light can change fast under tree cover. Try a couple of angles where the subject is framed by greenery, and another where you shoot toward open sky for cleaner brightness.
Possible drawback: it’s a park, not a museum. You might find that your best orchid shots depend on conditions you can’t control (weather, crowding, what’s in bloom). The value here is pacing and variety, not guaranteed rare flowers.
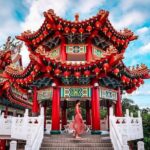
Thean Hou Temple: red pillars, dragon details, and a spiritual photo palette
For color and photo-ready symbolism, Thean Hou Temple is one of the strongest stops on the route. It’s about 30 minutes and free. The tour info highlights red pillars, dragons, and prayer rooms, and it notes the blend of Taoism, Buddhism, and Confucianism.
This is the kind of place where the “wide shot” is just step one. After that, you can photograph patterns, carvings, painted surfaces, and the way people move through the space. Temples also reward patient framing—doorways, roof edges, and repeating decorations can create a strong photo rhythm.
If you like panoramic views, the stop includes that angle as part of the experience, so you’re not limited to close-ups.
Possible drawback: temples involve active worship spaces. Keep your movements respectful and keep an eye on signage and where you’re allowed to photograph. That’s not a problem for most people—it just means you’ll want to slow down.
- Private Tour Kuala Lumpur with Petronas Twin Towers Observation Deck & Batu Cave
★ 5.0 · 1,029 reviews


KL Tower: 421 meters up, included observation access, and two ways to get there
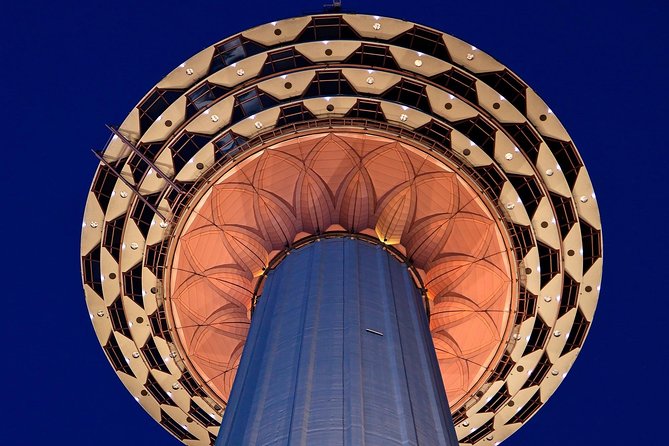
Then it’s up to KL Tower, included for about 1 hour. The tour info gives a height of 1,381 feet / 421 meters and calls out its glass dome. You can reach the observation area either by staircase or elevator, so you can match effort to your energy level.
For photos, this is the “wrap-around city” stop. Even if you’re not shooting professional skyline images, an observation deck helps you see where everything sits—so your earlier ground-level shots make more sense when you review them later.
Practical tip: at tower heights, reflections from inside glass can show up in your photos. If your camera has it, try switching to the right angle to reduce glare. Also, if the day is humid, the atmosphere can soften distant details—plan to shoot both the far view and the closer foreground elements like railings and floor patterns.
Possible drawback: tower time can feel repetitive if you’re only interested in one type of shot. Here you’ll get around an hour, so do a fast wide-to-detail sequence rather than waiting for one perfect moment.
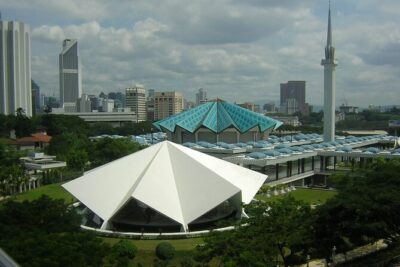
National Mosque (Masjid Negara): architecture learning with short, focused time
Masjid Negara (National Mosque) is about 20 minutes and free. The tour includes time that’s framed as learning about the architect of mosques—so it’s not only sightseeing, it’s meant to give you a bit of context while you photograph.
If your camera is set for skyline and you want a change of pace, the mosque is a strong contrast. Architecture like this offers big shapes, clean symmetry, and decorative elements you can photograph without needing complex access.
Possible drawback: this stop is short. Treat it as a structured “look and photograph” session. If you want a deeper look, you can always plan extra time afterward on your own.
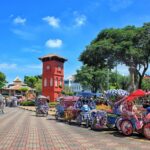
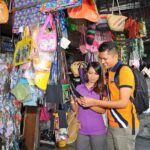
Chinatown stop: street-photo energy, food smells, and souvenirs within reach
Chinatown is on the route for about 30 minutes and free. The tour description points out the practical draw: local street food, cheap beer, and souvenirs.
This is a great place for street photography because you get layered scenes: storefronts, people, signage, and casual interaction. Even if you’re not planning to shoot faces, you can photograph hands, textures, product displays, and the general motion of a neighborhood.
Practical tip: street scenes are messy in a good way, but they’re also lighting-challenging. Try shooting in bursts and vary your angles—one that keeps the background simple, and one that includes the chaos for atmosphere.
Possible drawback: 30 minutes disappears quickly in Chinatown. If you love wandering, this can feel too short. Still, it’s ideal as a photo add-on within a packed day.
National Monument area: a quick icon stop for grounding your Kuala Lumpur set
After Chinatown, you get time at the National Monument area for about 30 minutes (free). This stop works as a “ground truth” moment in your photo collection: after towers and temples, you get a national-scale landmark that helps your set feel complete.
Because the tour time is limited, your best strategy is speed: aim for one or two compositions from the main viewpoints available to you, then use the rest of the time for details—shapes, edges, and surrounding context.
Possible drawback: if you’re hoping for deep exploration, the schedule gives you only a snapshot.
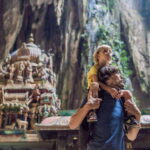
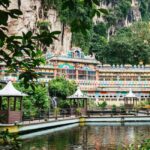
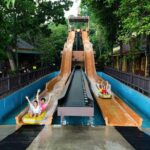
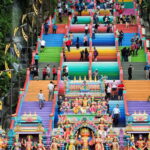
Batu Caves: the stair climb you’ll want to plan for
The final big highlight is Batu Caves. You’ll have about 1 hour, and the tour info labels admission as free. It also notes that Batu Caves is one of the most ancient sites in Kuala Lumpur, and the main activity involves climbing the caves.
This is a classic photography win because you can shoot multiple styles in one stop:
- a dramatic approach to the entrance
- temple colors and textures
- wider shots that show the cave setting
- detail shots once you’re inside or near key structures
Practical warning: the climb means you should wear footwear you trust. Also, plan for crowds at popular times, even though you’re on a private tour. Your guide and timing help, but the environment is what it is.
Possible drawback: Batu Caves is physical. If you’re combining it with KL Tower stairs (optional) earlier, your legs may feel it. Pace yourself—don’t sprint for photos.
What’s included, what’s not, and why that matters for your budget
This tour is $106 per person for a 6-hour private day built around photography. The price includes:
- an English speaking driver/guide
- hotel pickup and drop-off
- entrance tickets for Petronas Twin Towers
- entrance tickets for KL Tower (observation deck only)
- Sky Box tickets if Petronas tickets aren’t available last minute
- a mobile ticket setup
- a private format where it’s just your group
What’s not included: food and beverages.
So you’re really paying for three things: transport so you can move efficiently, guided timing so you’re not guessing, and included entry for the two hardest-to-plan attractions on the list. That tends to make sense for photographers who want less friction and more time shooting.
If you’re trying to keep costs down, you’ll want to budget for your meals. The good news is you’ve got enough time built into stops to grab something on the move, especially during the Chinatown segment.
Who this tour is best for (and who should look elsewhere)
This is a strong fit if:
- you want a private day without the stress of transit planning
- you care about architecture and landmarks, not just a checklist
- you like shooting a mix of skyline views, temple color, and street scenes
- you’d rather pay for included entries than hunt for tickets yourself
It may be less ideal if:
- you want a totally relaxed day with no stair climbing at all
- you don’t want to spend much time looking at architecture (because a big part of the route is exactly that)
One more note: booking tends to happen about 29 days in advance on average. That’s a hint to plan early if your schedule is fixed—especially for Petronas entry.
Should you book this Petronas-and-Batu-Route photo tour?
Yes, if your priority is getting a photo-driven Kuala Lumpur day that includes the big-ticket viewpoints without ticket headaches. The value comes from the combination of included admissions (Petronas plus KL Tower), private pacing, and a route that mixes famous landmarks with more textured scenes like Thean Hou Temple and Chinatown.
Book it if you’re happy to do stairs at Batu Caves and you’d rather bring snacks or lunch plans than rely on the tour for food. If you want a slower, less structured day, or you’re avoiding climbs, consider a lighter itinerary instead.
FAQ
FAQ
How long is the Private Day Kuala Lumpur Photographic Tour?
The tour lasts about 6 hours.
Is this tour private or shared with other groups?
It’s private. Only your group participates.
Is there an English-speaking guide or driver?
Yes. An English speaking driver/guide is included.
What major attractions have admission included?
Entrance tickets for the Petronas Twin Towers and KL Tower (observation deck only) are included.
What happens if Petronas Twin Tower tickets aren’t available last minute?
If Petronas tickets aren’t available for last minute booking, the tour includes Sky Box tickets.
Do I get hotel pickup and drop-off?
Yes, hotel pickup and drop-off are included. Airport transfer is also included if required.
Is KL Tower entry included?
Yes. KL Tower observation deck tickets are included, and the stop is about 1 hour.
Are meals and drinks included?
No. Food and beverages are not included.
What is the cancellation policy?
You can cancel for free up to 24 hours in advance of the experience start time for a full refund.
You Might Also Enjoy

More Private Tours in Kuala Lumpur
- Private Tour Kuala Lumpur with Petronas Twin Towers Observation Deck & Batu Cave
★ 5.0 · 1,029 reviews